Start Your Own Blog NOW
Start Your Own Blog – I will share with you the 4 easy steps that will get you started right now!
I’m sure you have a great idea, some strong opinions, a great product or some inspirational accomplishments you’d like to share with the world? Have you always wanted to start your own blog but something has held you back? You probably don’t know exactly how to get started. Right? Don’t worry, it’s easy! My 4 easy steps on how to start your own blog will walk you through exactly how to get started RIGHT NOW! If you follow these clear steps you will get your self-hosted WordPress blog online in almost no time at all! I promise!
*This post contains affiliate links. What this means is that by making a purchase through these links I will receive a commission (without it affecting the price you pay ) – you can see it as a little contribution to help me keep my little blog up and running.
People always ask me for advice on how to get started with their own blogs. Until now my best advice had always been, “Just get started. Just do it!” I realize now that this probably wasn’t the most helpful or clearest piece of advice on how to start your own blog. So today I’m going to tell you exactly how to get started! How to start your own blog: The step by step process that will actually get you started building your self-hosted WordPress blog! TODAY!
Keep reading! 4 Easy Steps for getting your blog started are coming right up!
If you know me and are familiar with my blog, you know that I love supporting other mommies! Most specifically the hard-working Mompreneur type of mommy. You know the one! She’s the one out there not only doing her own thing, but also helping other mamas along the way, providing solutions to problems we can all relate to. So, when one of the ladies from MommyHost reached out to me and told me all about their new web hosting service, dedicated to serving woman (moms, entrepreneurs, etc.) and helping them easily get their blogs or websites set up, I knew this was the perfect web hosting service for me to recommend to you. I’m confident that this is the best way for you to start your own blog!
What will I get when I start my own blog/website with MommyHost?
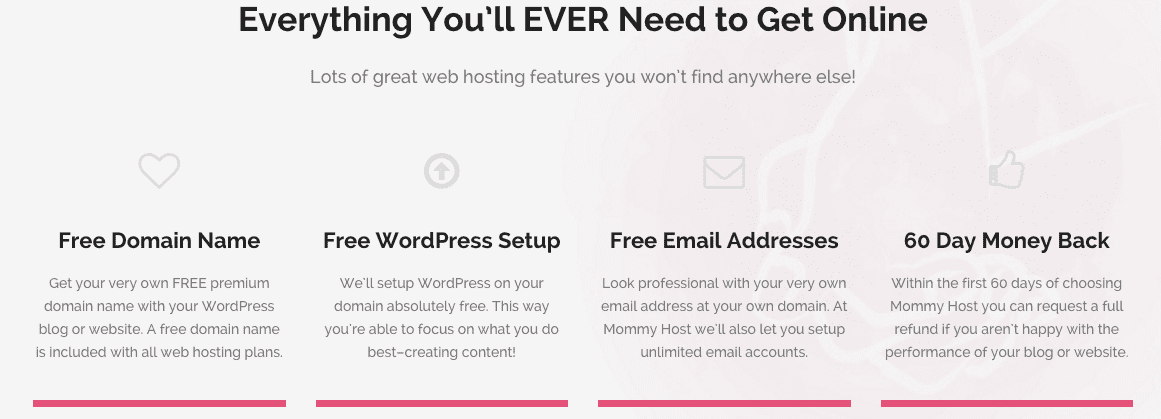
MommyHost offers everything you need to start your own blog, all in one place, for the right price, the best service, plus a 60 day Money Back guarantee (and a discount code that I will share later in this post). They have simplified the process and automated the setup for you! This means that when you sign up with them, they’ll set up your account with WordPress. They will do everything for you, that’s so much more than hosting, in my opinion. You won’t have to go through the setup process yourself. Nothing to download! At all!
Other popular web hosting services will ask you to download WordPress yourself when you start your own blog. I remember how much I hated having to do that when I started this blog! I had no idea what I was doing. I knew that a self-hosted WordPress website was the best type of website to have. All the advice out there will confirm this. I won’t go into the details of why you need a WordPress website. What I will tell you is that You could use a free service, but I highly recommend you opt for self-hosting instead. You get what you pay for. Trust me, you’ll be so glad you started out on the right foot. Plus, you don’t want to limit yourself with a free service.
I’m sure you can do your own Google search and find tons of advice on the reasons why you need a self-hosted WordPress website, one of the most popular sites to have. However, once you read through all that advice you’ll probably begin to feel intimidated by the thought of having to set up your own WordPress website. I sure did, but you don’t have too if you choose MommyHost!
MommyHost will provision your account with WordPress so you don’t have to go through that setup process yourself. This will eliminate a lot of frustration when you start your own blog! Trust me! I wish I would have had MommyHost when I started my blog. The web host (and I won’t name them) I originally used didn’t do any of this for me. I was pretty much on my own! I’m so glad you won’t be 🙂
Are you ready to share your voice, ideas, advice and accomplishments with us online? Are you ready to get started on your new journey? Are you that woman, mom, entrepreneur, ready to share your story? Are you ready to start your own blog? Don’t wait! Just get started! Believe me. There are tons of people out there just waiting to hear your story! Get started today! Here’s how in 4 easy steps. Plus there’s a discount count code coming your way so make sure to read on! Are you ready?
Start Your Own Blog in 4 Easy Steps
Choose a Hosting Plan
Choose Your Domain Name
Choose Your Billing Cycle
Choose a WordPress Theme
1. Choose a Hosting Plan
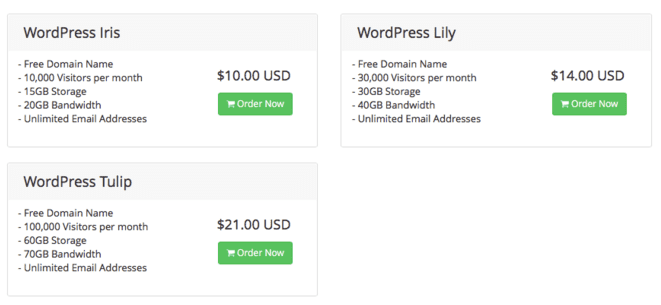
Mommy Host is super easy to use! They will have your website up and running in just a few minutes. They offer 3 different plans. These will work for any size website. I highly recommend the Lily Plan. For just $4 more you’ll get some nice upgrades and still won’t break the bank! Start by choosing your plan. Once you’ve decided which plan you want to order, click the “Order Now” button. This will take you to the first step of the checkout process.
I’ve tried MommyHost myself and just love the ease of it! Which plan will you choose?
Get started NOW! Click The Get Started Button below * (MommyHost will open in a new window so you can come back and reference these instructions as you work on starting your own blog).
SPECIAL BONUS: Copy this coupon code nyctech10
MommyHost will give you a special 10% discount on a 1 or 2-year billing cycle if you apply the coupon code nyctech10 during the last step of the checkout process. Don’t forget to copy the coupon code now!
2. Choose Your Domain Name
Here’s the fun part: Choosing your domain name! Your domain name is the URL someone will type into their browser to reach your blog. This will be the name of your website and what people will use to find you on the web. Once you click the “Order Now” button you’ll be taken to the first step of the checkout process, but before you click, I want to share with you some tips for choosing a domain name.
Tips for choosing a domain name:
- Make it easy to say and spell. Choose something catchy, that helps! You want to give your domain name some careful thought. This is something you will want to use across all forms of social media as well. For example, you can find me as NYCTechMommy on Facebook, Instagram, Twitter, Periscope, Pinterest, etc.
- Before you purchase, take a moment to Google search the name you have chosen. You want to make sure it is not already being used by someone else but you also want to choose a name that doesn’t too closely resemble the name of another website or person already out there. You want to be original!
- If you’re still at a loss for what to use, I recommend using your own name, or some variation of your name, as the name for your blog. For example, www.JaneDoe.com. You can then use your own name across Social Media networks as well. You will be Jane Doe on any of the Social Media platforms you choose to join, Facebook, Instagram, Twitter, Periscope, Pinterest, etc.
- Don’t include hyphens, numbers, unknown terms or confusing strings of words or numbers. Keep it simple!
- If you’re still stuck on finding an appropriate name, get creative! Try a phrase if you’re having trouble finding an available name. Try different combinations of that phrase! Just don’t forget to go back and Google search it. Make sure something to closely related is not already in use by someone else! Remember, you want to be memorable! You don’t want to be confused for someone else!
- Go with a .com website so make sure to add .com at the end of the name you have chosen.
Are you ready? Now that you have the perfect name you are ready to register it as your domain name. You will have three options to choose from. Since you are starting a new blog, you will want to choose option #1. By choosing option #1, MommyHost will register your domain name at no cost for the first year!
3. Choose Your Billing Cycle
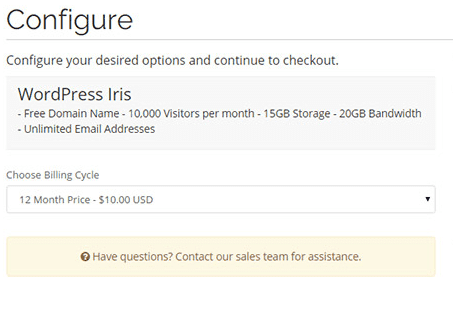
Now that your domain name is all set up, you’ll want to choose the billing cycle for your account.
Remember, if you choose a 1 or 2-year billing cycle and use the coupon code nyctech10 you’ll receive a 10% discount on your total in the last step of the checkout process! Don’t forget to apply this promo code!
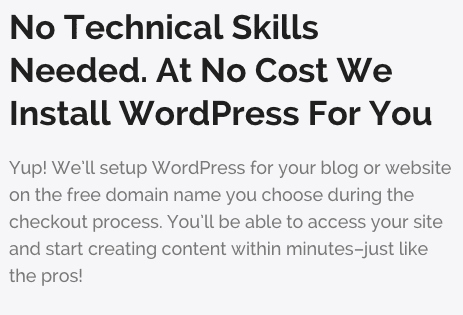
Go ahead and complete the checkout process and successfully submit your order, MommyHost will take care of the rest! Remember, no technical skills are needed since they’ll add WordPress at no additional cost to you! This is something that no other web hosting company will do for you. You just gotta love that! I sure do!
You’re almost done! Your blog will be up and ready in just one more step.
Wasn’t that easy? Aren’t you excited!
4. Choose a WordPress Theme
Remember, MommyHost has already set you up with WordPress. Now it’s time for you to select the WordPress Theme for your blog. In this step, you will get to choose the look and feel for your blog/website.
You’ll find that your account is pre-loaded with three basic WordPress themes. You can choose to use any one of these for FREE. At first, you might want to start by choosing a FREE theme. However, if you’re interested in using a different theme (now or later down the road) you do have some other options:
Download a free WordPress theme
WordPress.org – Showcases many free WordPress themes you can browse and download. You can filter your choices by color, layout, features, and subject.
You can purchase a premium WordPress theme
You could also choose to buy a premium WordPress theme from many of the marketplaces out there. If you take a look around, I’m sure you’ll find just what you’re looking for. Many popular marketplaces, even Etsy shops, offer themes designed specifically for mommies and the female demographic. You can also find many modern themes out there that will give your online space a fresh and chic feel.
What are you waiting for? Start your own blog! Get started NOW! Click The Get Started Button below * (MommyHost will open in a new window so you can come back and reference these instructions as you work on starting your own blog).
 That’s it! You just started your own blog. Congratulations! You are now on your way to becoming a rock star! Wasn’t that easy?
Now that you are the proud owner of your own website, you will want to hear more of my great tips for success. Don’t miss out on other great discounts and freebies too! Enter your contact info below and I’ll send this great content right to your inbox. Of course, if you ever have a question, or need some help setting up your new blog/website, you can always contact me here.
Was this post helpful? If so, please consider sharing it with others who might also appreciate it? Just use the social media sharing buttons over on the left side of this page. Click away and show me some love! Thanks!
Start your own blog! Click The Get Started Button NOW!
